VI. Creating Documentation
Video Recording for Documentation
When I started this project, I set my mind to documenting the steps as thoroughly as possible without being exceedingly boring or getting lost in details. I decided to record videos of the process of upgrading of the retro hardware, record videos of the initial sketches and story breakdowns, make screen videos of the actual pixeling and drawing process directly by capturing the video signal from the Framemeister upscaler attached to the Atari STE.
I recorded three videos that I uploaded to YouTube chronicling the journey to the finished pixel art comic.
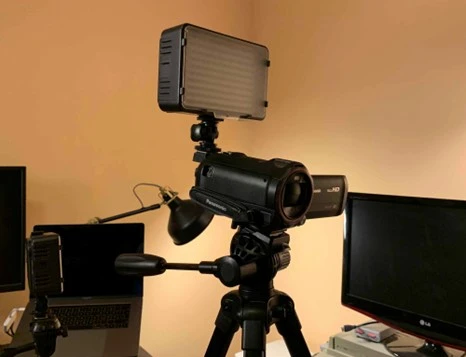
I used two Panasonic HCV-180 HD digital camcorders on tripods to record the manual drafting and design process at the drawing board. I had two additional photo lights, one on a tripod, and one attached directly to the camera via the shoe.

Figure 39: The camera and lights setup for filming
(Source:
Marin Balabanov)
For the captures of the Atari STE's screen I used an Elgato HD60 Game Recorder to feed the HDMI signal from the Framemeister into it, and then provide a pass-through to the monitor. The elaborate chain of the Atari ST using a SCART cable, converting that to a composite video cable, attaching that to the Framemeister that needs a few milliseconds to upscale the video, feeding the Elgato HD60 and then finally reaching the destination of the LCD. By default, this adds a few milliseconds delay definitely introduced a slight lag between input and the video display, but that was barely noticeable. Furthermore, I only recorded a part of the drawing process, leaving the Elgato HD60 detached and using the Framemeister directly attached to the LCD for most of the time.

Figure 40: The Elgato HD60S (Source: elgato.com)
For the voice recording I used a small Sony voice recorder designed for office use (which explains the mediocre sound quality).
I used Final Cut Pro X on a MacBook Pro to edit and composite the disparate videos and audio files, adding some chiptune music I captured from YouTube videos of old-school demos.
The final results were rendered to HD and uploaded to YouTube. Together with the text of this document the videos can be found at marincomics.com/duk-pixelart/

Figure 41: Close-up of the camera and light setup
(Source:
Marin Balabanov)